Monetization
Step 1 - Set Up Developer Portal
Beta Feature
The monetization feature is currently in beta and is subject to change. There may be bugs and issues that are not yet resolved. Use with caution and please report any issues to support.
This guide will walk you through the steps required to set up your Zuplo API's Developer Portal. This is where your customers will see and subscribe to your API plans.
If you don't already have a Zuplo API, you can create a new project using the "ToDo" sample or following step 1 of the Getting Started guide.
You'll also need a Stripe account. If you don't already have one, you'll need to register for one.
Tip
You don't need to go through the full set up process in Stripe. You can follow this tutorial using Stripe's test mode. We recommend using Test Mode on your Stripe account. This will allow you to test creating subscriptions with different plans without using real money.
Once you have a working Zuplo API and a Stripe account, we can move forward!
1/ Set Up in Stripe#
You need to have a couple things set up in Stripe before enabling Zuplo monetization.
Your API customers will subscribe to a "Plan" in Zuplo. Plans are associated with Stripe Products. The Stripe Product is what determines the price your customers will pay to use your API.
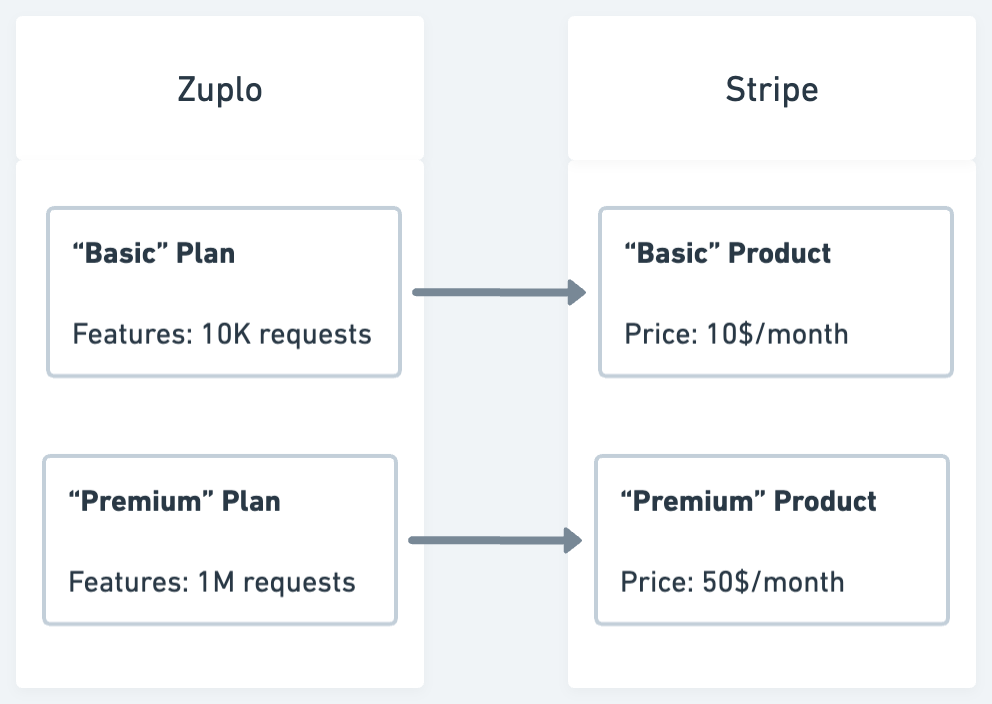
The "Plan" in Zuplo is where you will define the limits of each plan. For example, the "Basic" plan might be limited to 10,000 requests per month while the "Premium" plan may be limited to 1,000,000 requests per month.
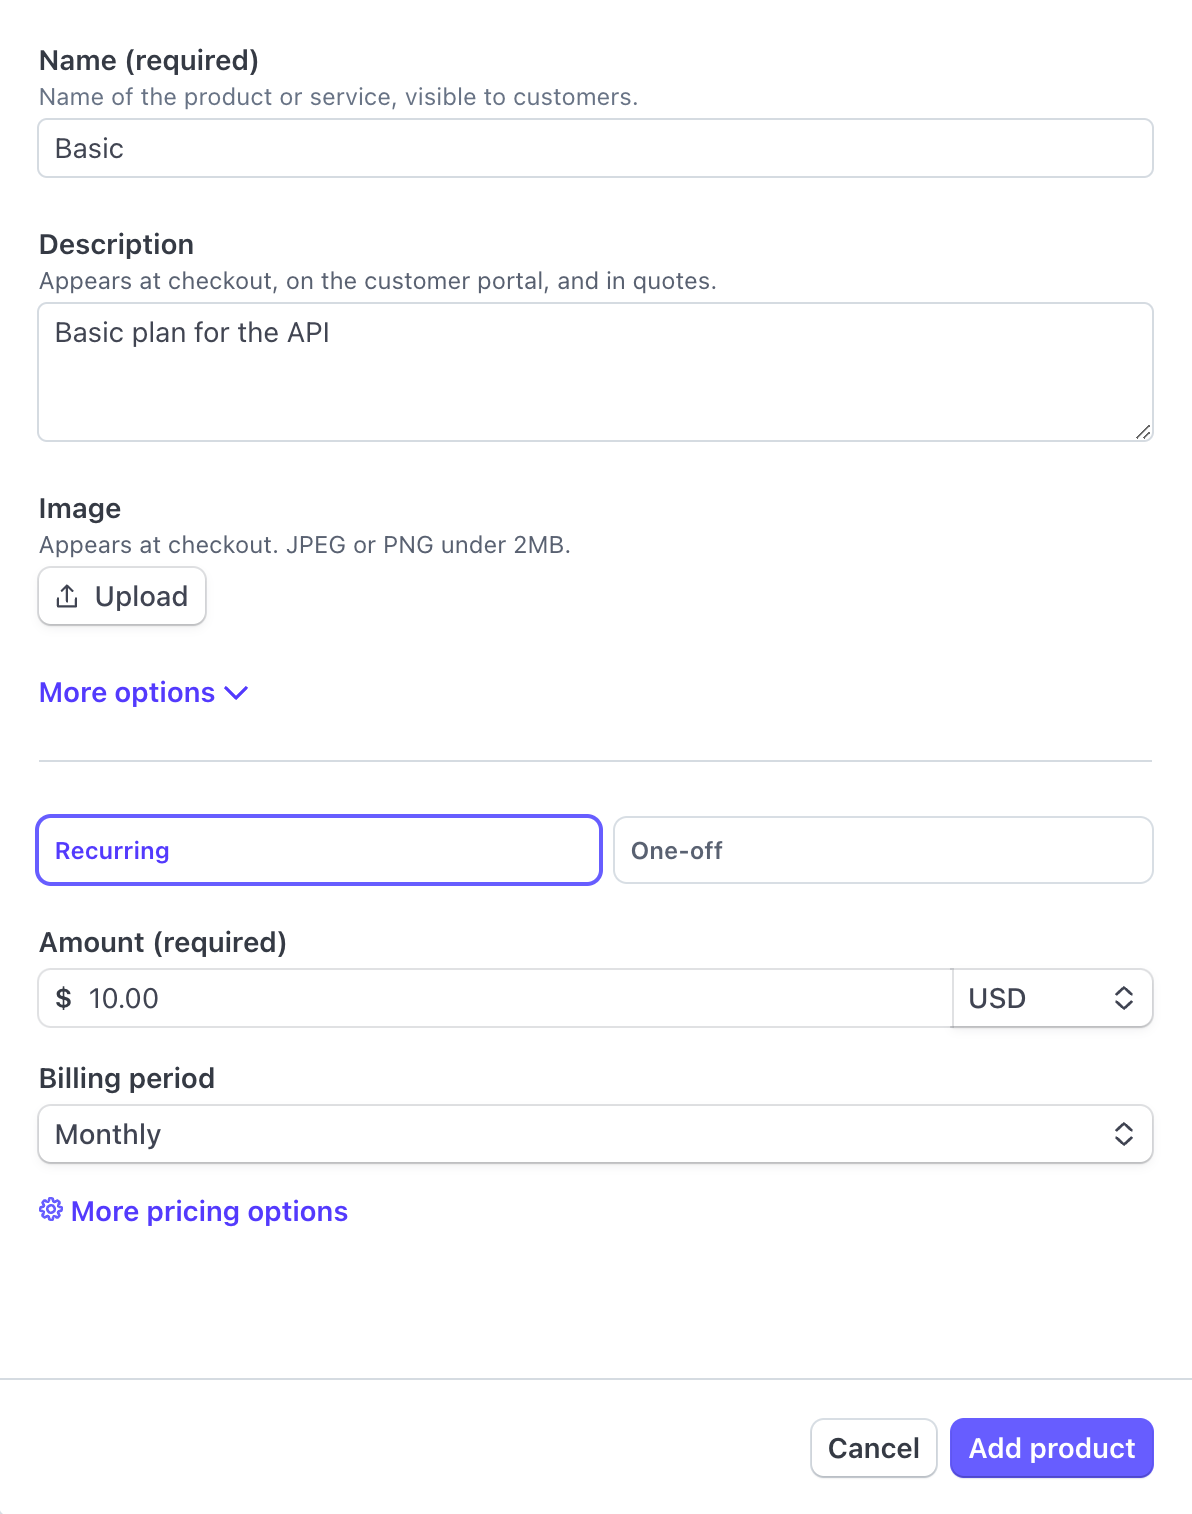
Creating Stripe Products#
When you create your products in Stripe, set each product as Recurring on a Monthly billing cycle.
Creating a Stripe Pricing Table#
Once you've created your products, you will need to create a Stripe Pricing table. Follow Stripe's guide for creating a Pricing Table.
2/ Set Up in Zuplo Portal#
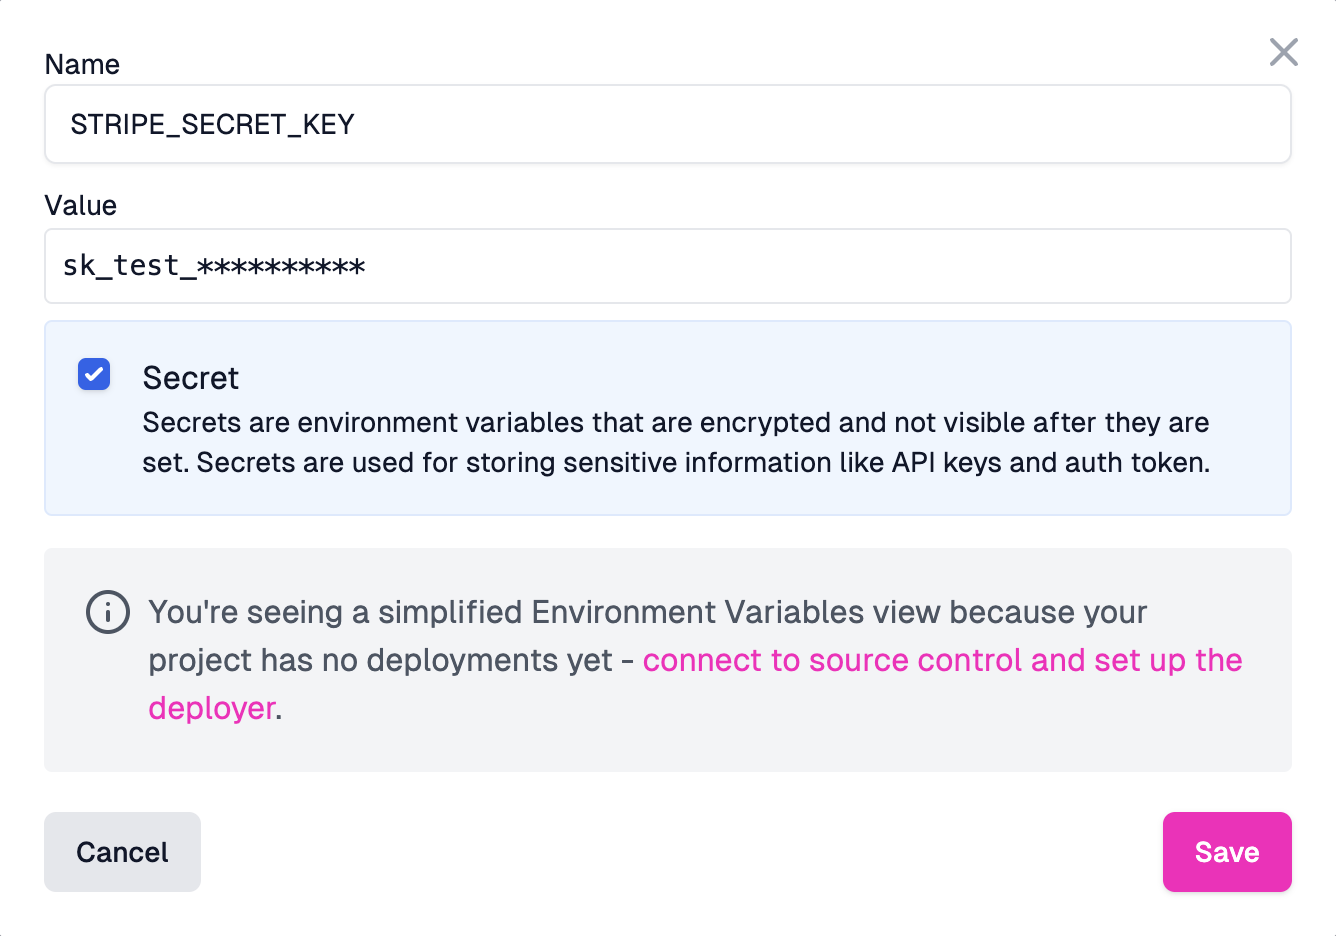
In order for your Zuplo API to connect to Stripe, you'll need to set your Stripe API Key as an environment variable.
- In Stripe, navigate to the API keys section of Stripe's developer dashboard. Copy the value of the Secret Key.
- Return to the Zuplo Portal, go to your project and open the Environment Variables section in the Settings tab.
- Click Add Variable and name your new environment variable
STRIPE_SECRET_KEY. - Set this variable as a secret and paste the Stripe API Key as the value. Click Save.
Configure Your Developer Portal#
Next, you will enable the monetization pages in your Developer Portal.
- In your Zuplo project, go to the Code tab and select the file
dev-portal.json. - Scroll to the Monetization Settings section and select the checkbox Enable Monetization.
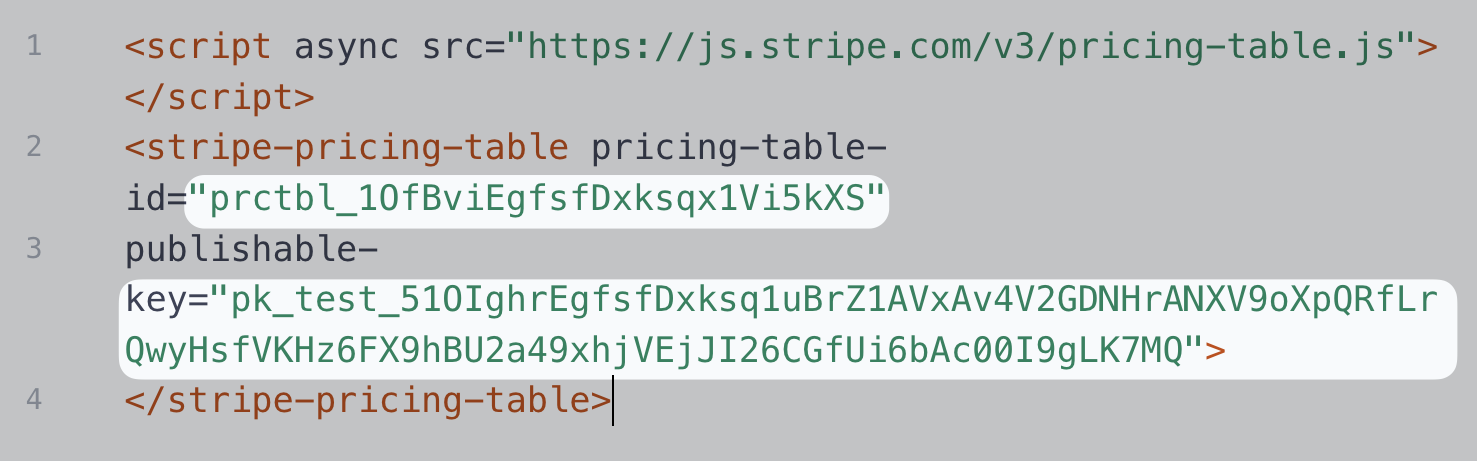
- The values for the fields Pricing Table ID and Publishable Key can be found by opening the pricing table in the Stripe Dashboard Pricing Table section.
- Copy the value for
pricing-table-id(it starts withprctbl_) and set it as the value for Pricing Table ID in the form in the Zuplo Portal. - Copy the value for
publishable-key(it starts withpk_) and set it as the value for Publishable Key in the form in the Zuplo Portal.
- Finally, click the icon next to the Secret
Key field and select the environment variable
STRIPE_SECRET_KEYyou created earlier. This will prefill the form with the value$env(STRIPE_SECRET_KEY). - Click save to publish your changes.
3/ Preview Your Developer Portal#
Now that your Developer Portal is configured for monetization you can open it and view the pricing page. Click the toolbar on the bottom of the Zuplo Portal to find the URL of your Developer Portal.
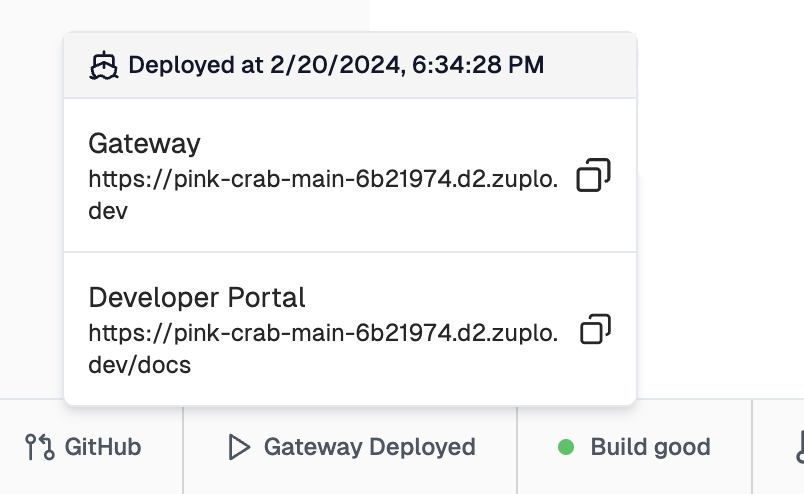
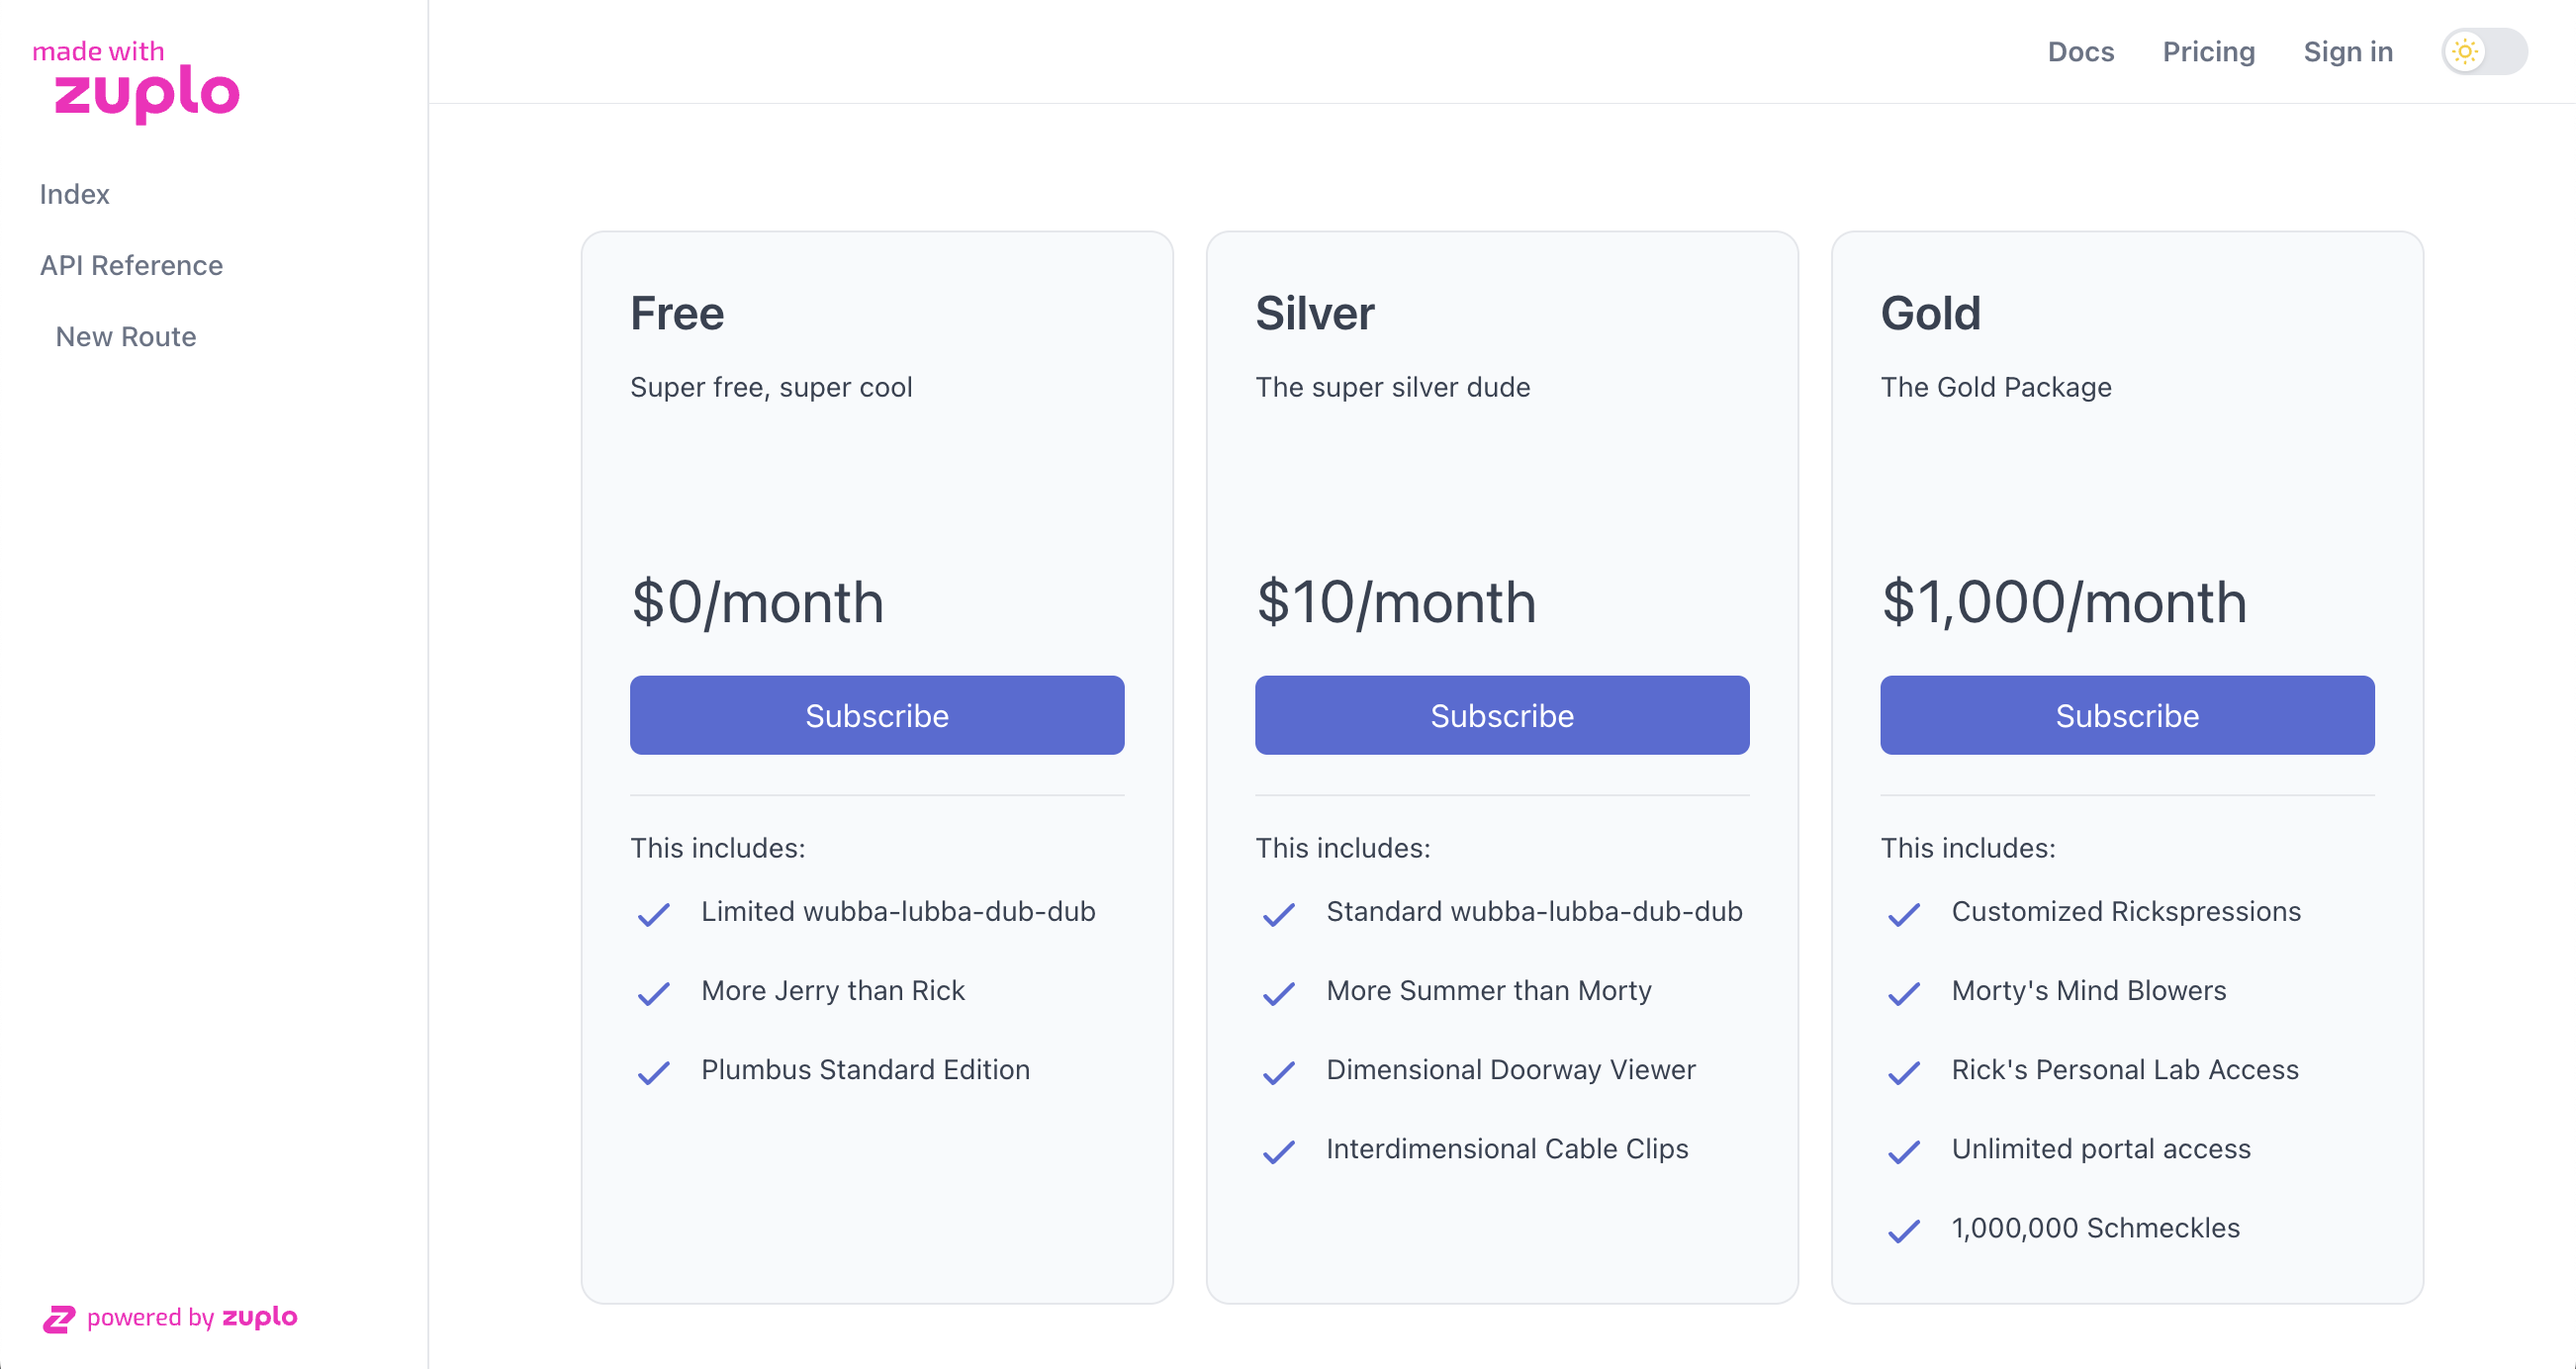
Once you open your Developer Portal, you will find a link to the Pricing page on the top right menu section. Open the Pricing page in your Developer Portal to see the pricing table that you have configured as the Pricing Table ID in the previous step.
Caution
Don't go through the process of subscribing to an API plan yet. In the next step we will configure the Stripe Webhook that will tell your API that a subscription was created.