


Supaweek Day 1 - Using Supabase and OpenAI to create an API

Supabase is an amazing platform for building applications that scale to millions of users yet handle complex scenarios, while still keeping a great Developer Experience (DX). We love great DX and we think it's time we show you how to build an API (using AI of course) with the Supabase platform and Zuplo, in minutes.
This is why we're launching the Supaweek, an entire week of content to show you how to build a production-ready API backed by Supabase, OpenAI, and Zuplo. We'll be releasing new content each day, so make sure to come back to check it out!
What are we building during the Supaweek?#
We will create an API that generates a blog post based on a topic and saves it
in a Supabase DB. The API will have a single path /v1/blogs that accepts a
POST method to generate an AI-based blog post using OpenAI and save the result
in a Supabase DB.
We will then add authentication so that only authorized users can access it, and rate limiting to control the number of requests per user.
Over this week we'll be building up features with this API - so, let's start with today's goal, shall we?
Step 1 - Create a Supabase DB and table#
If you haven't already, create a new project in Supabase and create a table
named blogs with the following columns:
id (int8)
created_at (timestamptz)
content (text)
title (text)
Step 2 - Deploy your Zuplo API#
You can find the repository that contains the configuration we need to create the API here.
You can deploy it to Zuplo by clicking on the button below:

Step 3 - Add the required environment variables#
In Project Settings > Environment Variables add the following API Keys with your own values:
OPENAI_API_KEY=
SUPABASE_URL=
SUPABASE_SERVICE_ROLE_KEY=
Step 4 - Explore the existing routes#
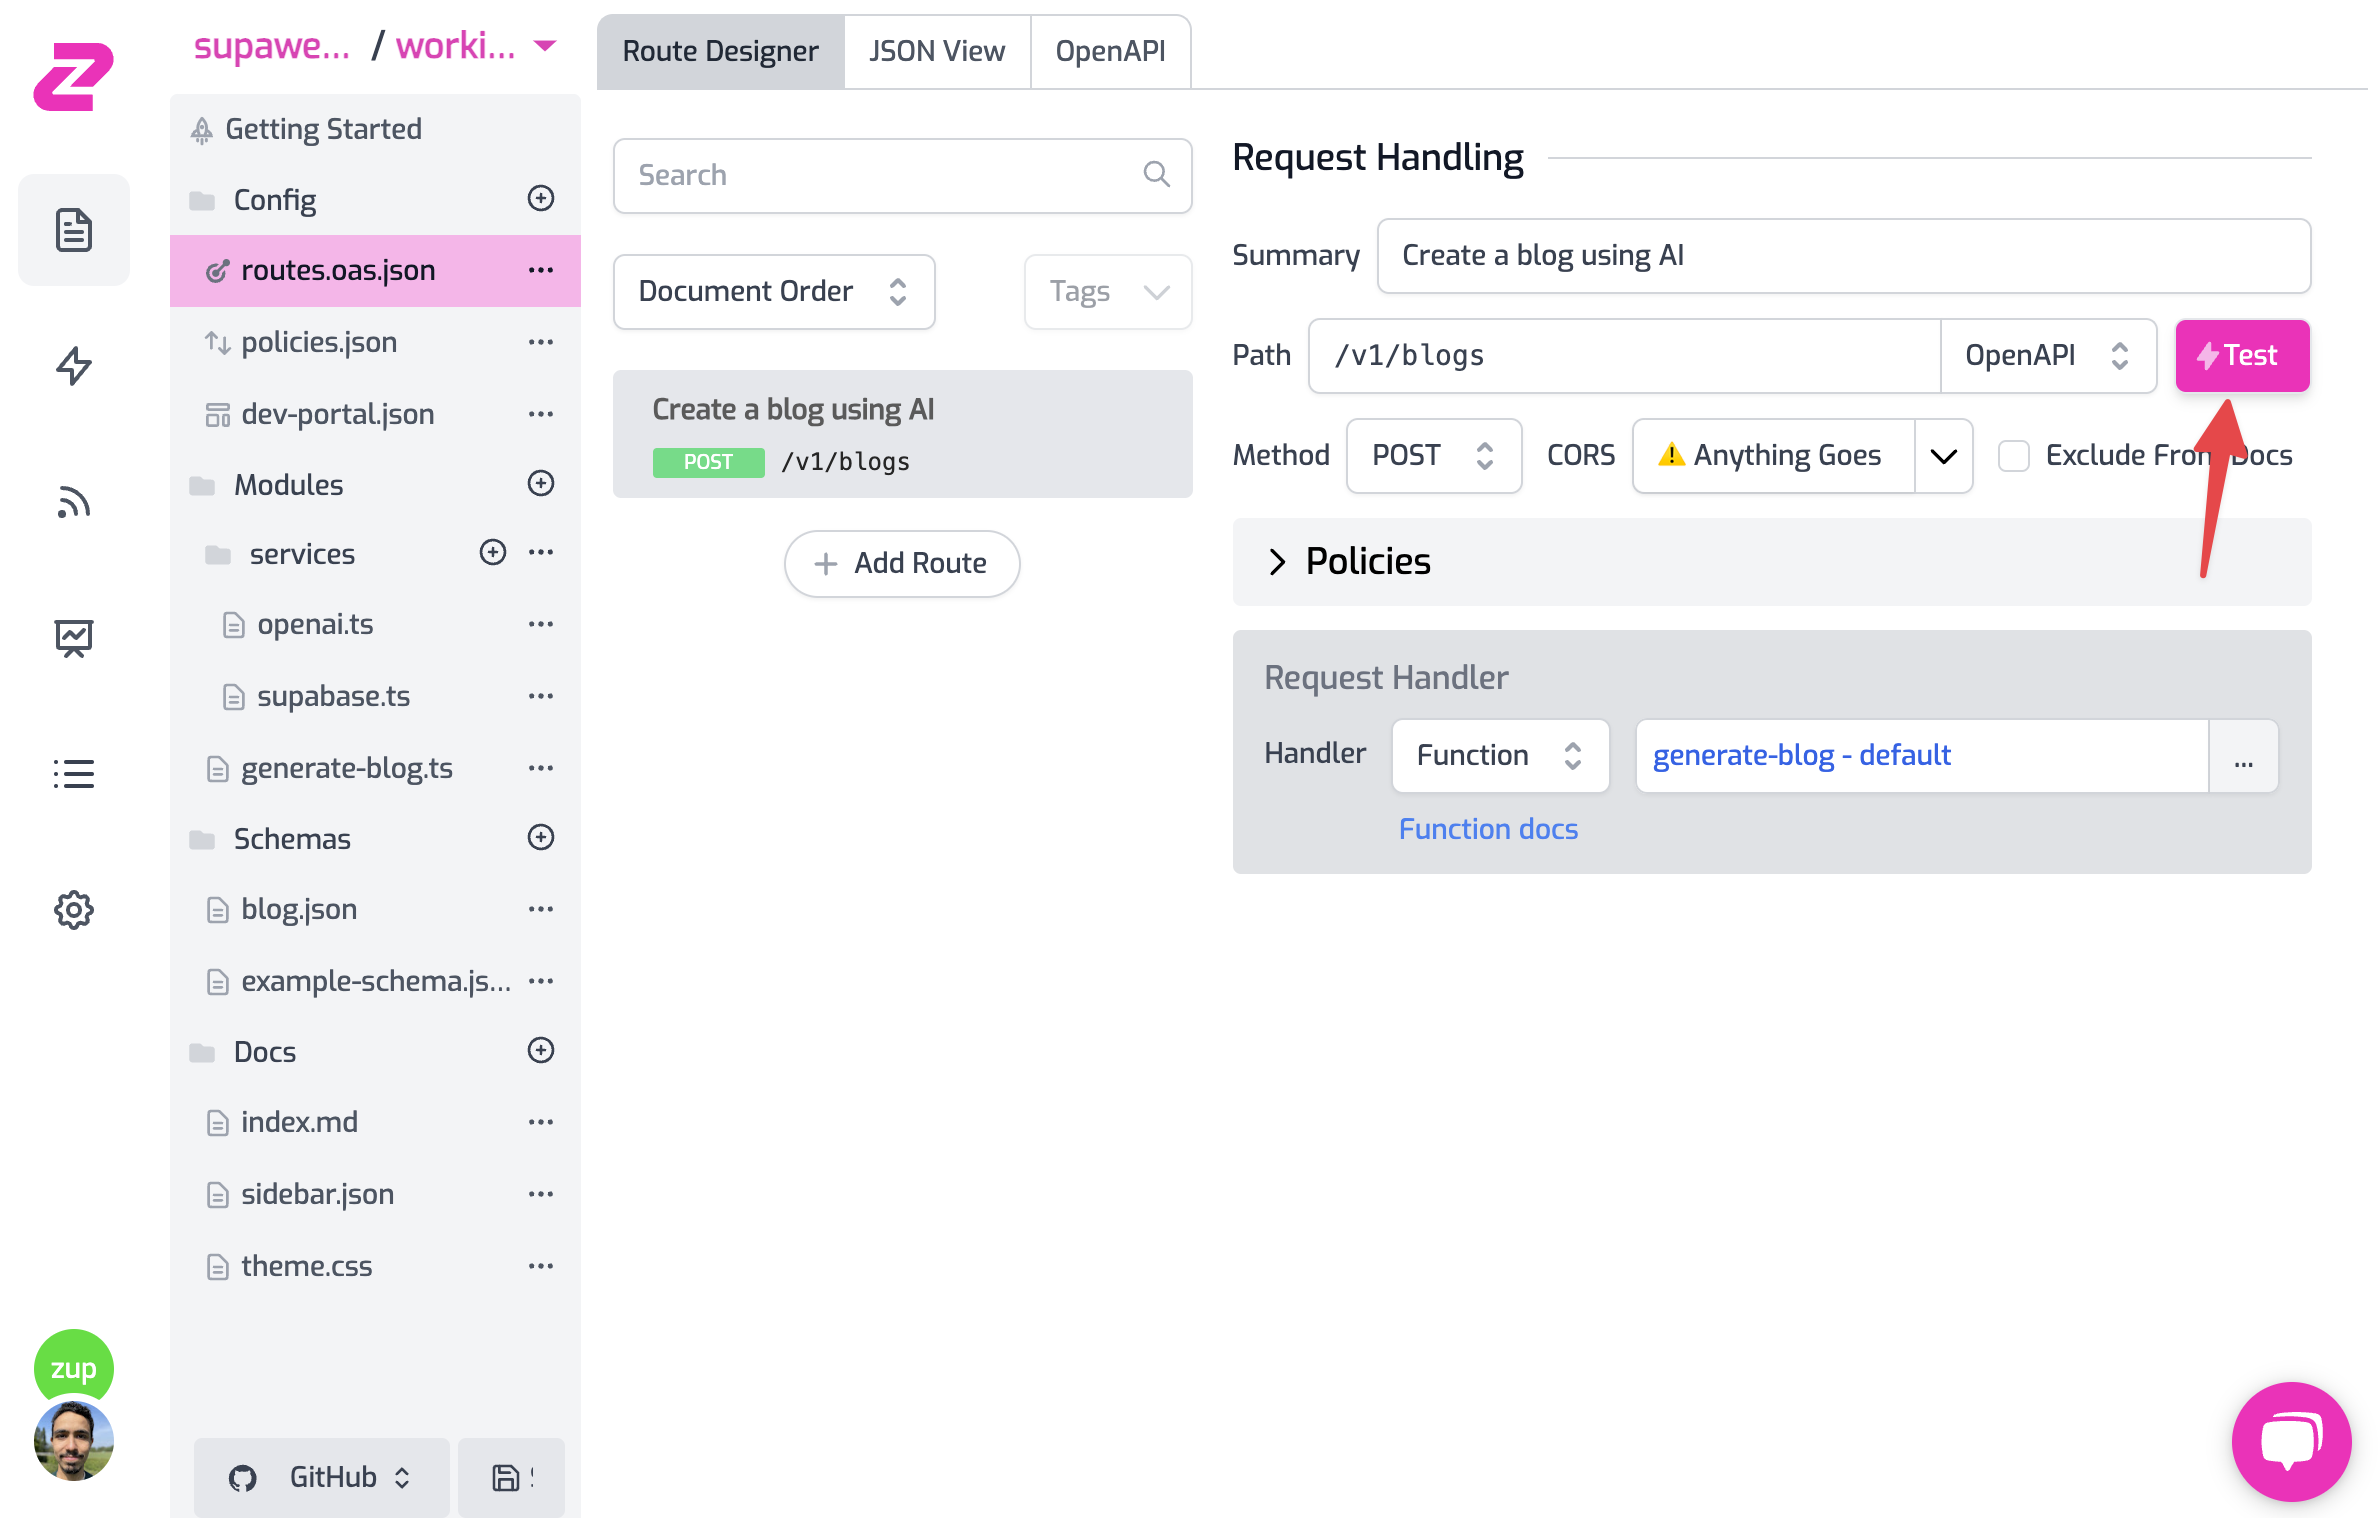
Click on File > routes.oas.json > Create a blog using AI and you'll see
the route /v1/blogs with the POST method. If you now click on Policies,
you'll see the following:

This is the flow of any request that goes from your gateway to the backend:
- The request will first hit the api-key-inbound policy: this means that unauthenticated requests will be rejected with a 401 (and a beautiful error message)
- It will then go through the rate-limit-inbound policy, if you click on it you will see that it is configured to only accept 10 requests per minute per user. How does it know about the user? Because they're using an API Key it automatically understands how to block the request.
- The request will now go to the Request handler (i.e. the backend). In
this case it's a Function Handler, a programmable handler of Zuplo. If you
Click on
generate-blog, and you'll see the code for handling thePOSTrequests using OpenAI to generate a blog post and save it into your Suabase DB.
Step 5 - Create an API Key#
To make an authenticated request to the API, create an API Key in Project Settings > API Key Consumers > Add New Consumer. You can leave the metadata and manager fields as they are for now.
Once you have created the API Key, copy it as we will use it in the next step.
Step 6 - Make a request to the API!#
Now that you're all set create a blog using the POST method on /v1/blogs.
You can make requests using the test console (similar to Postman) which you can
find by clicking on the route as follows:
- Add your API Key header in the format
Authorization: Bearer zpka_1234and make a request - Add the request body. This endpoint accepts a JSON in the format
{ "topic": "you blog topic" }. Add it to whichever topic you want OpenAI to create the blog about. - Hit Test! 💥
Now you have a ready API, with Auth, rate limiting, and using some of the best services like OpenAI to spice up your API with AI and Supabase DB with a programmable layer to access your data.
Step 7 - Add a GET route to get all blogs#
1. Create the GET route#
Click on File > routes.oas.json > Add Route. Configure the route as follows:
Description: Get all blogs
Path: /v1/blogs
Method: GET
If you click on Save all and then test the route, by default, you will see
that it returns the request that's forwarded to https://echo.zuplo.io, which
is a service that echoes back the request. This is because we haven't configured
the route to do anything yet.
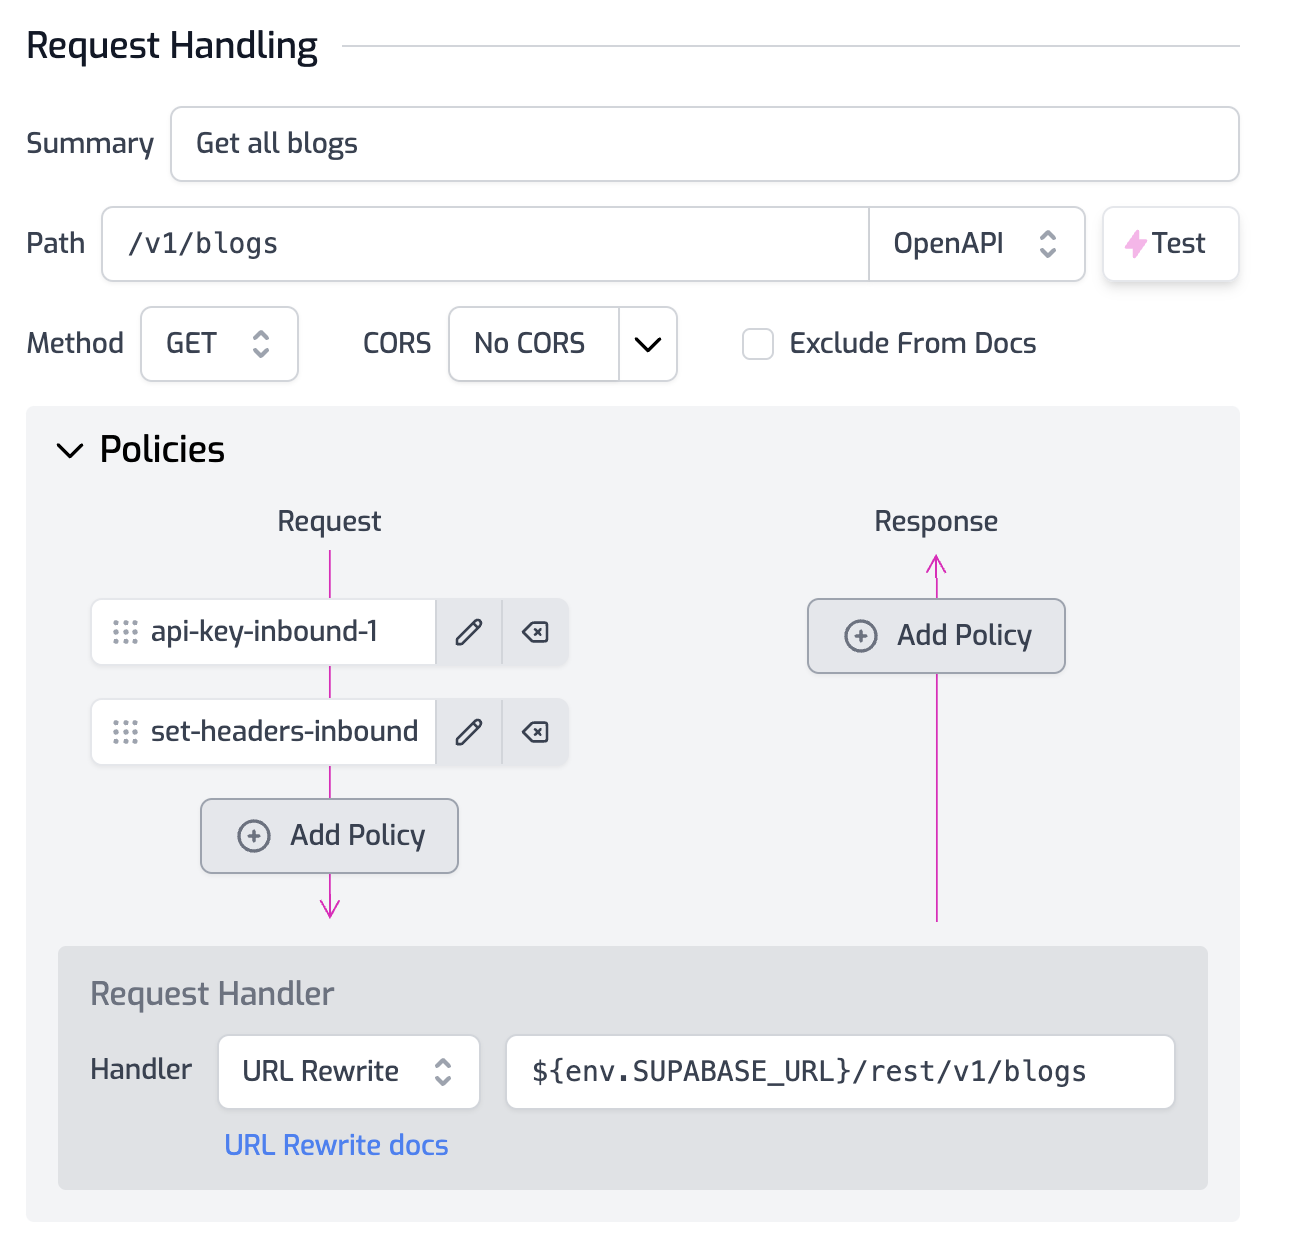
2. Configure the Request Handler#
Let's change the request handler to return the blogs from the Supabase DB. Click
on the route and then on the GET operation. You'll see that the request
handler is set to https://echo.zuplo.io.
Change the handler to URL Rewrite, which hits the configured URL without
passing any of the original request path or query parameters. Then, change the
URL to your Supabase DB URL: ${env.SUPABASE_URL}/rest/v1/blogs, this is
because
Supabase
exposes their DB in a RESTful API so you can access it conveniently.
If you click on Save all and then test the route, you'll have an error from Supabase saying that you're not authorized to access the DB:
{
  "message": "No API key found in request",
  "hint": "No `apikey` request header or url param was found."
}
In the next step, we will add the necessary headers to make the request authorized. The headers will be added by Zuplo, so only the Gateway can access the DB but not the user.
3. Add the Supabase headers#
In the route's request path, click on Add Policy and search of Add or
Set Request Headers, click on the policy to add it to the route and configure
it as follows, which will add the headers apikey and Authorization and
configure them with the Supabase Service Role Key which is needed by Supabase to
authorize the request:
{
  "export": "SetHeadersInboundPolicy",
  "module": "$import(@zuplo/runtime)",
  "options": {
    "headers": [
      {
        "name": "apikey",
        "value": "$env(SUPABASE_SERVICE_ROLE_KEY)",
        "overwrite": true
      },
      {
        "name": "Authorization",
        "value": "Bearer $env(SUPABASE_SERVICE_ROLE_KEY)",
        "overwrite": true
      }
    ]
  }
}
Now save the configuration and test the route. You should see the blogs from the DB! But the route is not secure and anyone can access it. Let's add authentication to it.
4. Add authentication to the route#
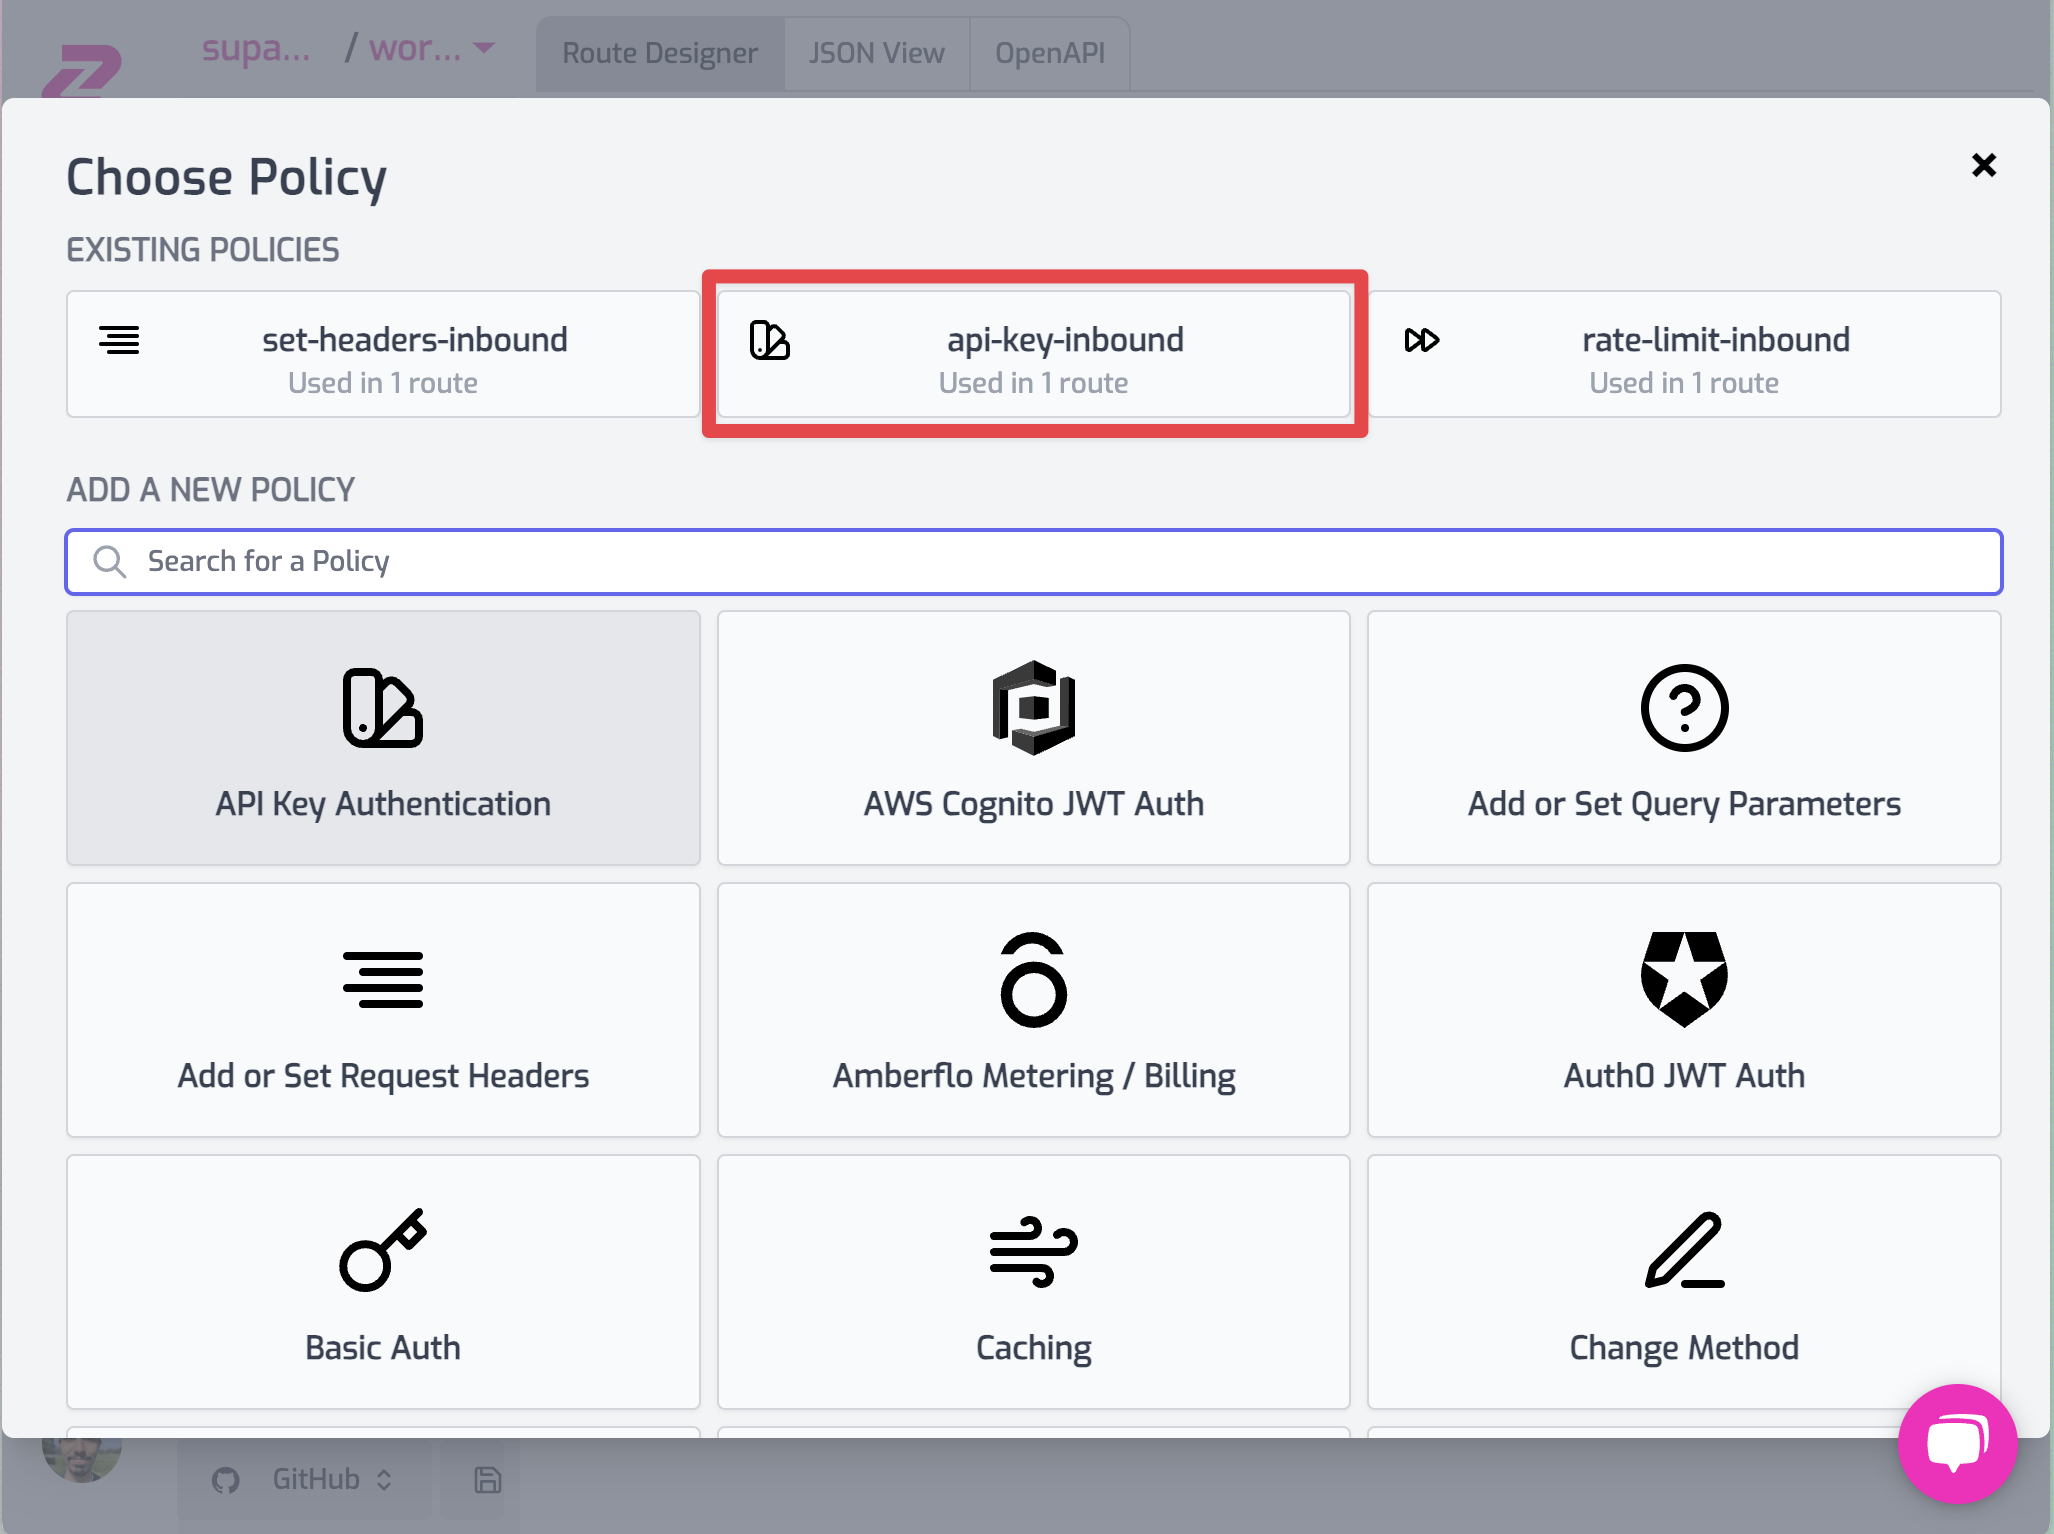
Click on Add Policy again and now select from the top the
api-key-inbound policy from the Existing policies list.
Make sure to reorder the policies (just like in the picture below) by
drag-and-dropping so that api-key-inbound policy runs before
set-headers-inbound, this way you stop unauthenticated requests from being
rejected before adding the secret headers.
If you check the policies in the POST operation, you'll see that it includes
the rate-limit-inbound policy which we didn't add to the GET operation. This
way we can rate limit for expensive operations (like using OpenAI) but not for
cheap ones (like reading from the DB).
Save your configuration and... that's it! Now only authenticated users can access the route. If you test it without an API Key you'll get a 401 error.
This is Day 1 of Supaweek#
Here's a video walkthrough of the steps above:
If you have any questions, comments or feedback, join us in our Discord server, or drop us a tweet (or xeet...) at X. We'd love to hear from you!
Check out Day 2 of the Supaweek here, where we'll add user-level auth to the API.